Contents
- Why does the MacBook Pro / Air with M1 / M2 chip only support one external display?
- How can you connect two or three external displays to a MacBook M1 / M2?
- How do you connect the Casecentive DisplayLink docking station?
- How many displays does the Casecentive 13-in-1 docking station support?
- How does DisplayLink technology work?
- What are the benefits of DisplayLink?
- How do you set up multiple external monitors on macOS?
- Which docking station do you need for MacBook M1 / M2?
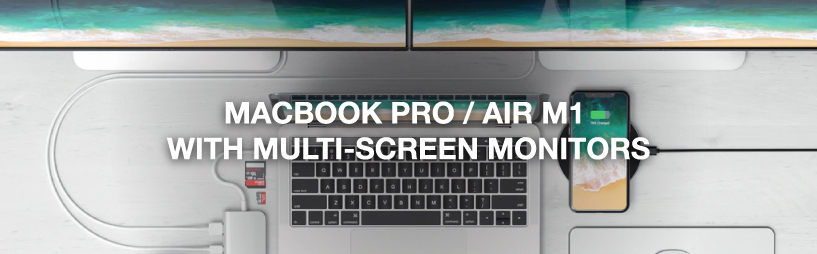
The introduction of Apple’s M1 and M2 chips brought major performance improvements, but also one well-known limitation: MacBook Air and MacBook Pro models with M1 or M2 officially support only one external display. Fortunately, there is a professional solution that removes this limitation entirely.
Why does the MacBook Pro / Air with M1 / M2 chip only support one external display?
Apple designed the base M1 and M2 chips with a single external display pipeline. Unlike older Intel-based MacBooks, the limitation is not caused by the USB-C ports themselves, but by the GPU architecture inside the chip. Only the M1 Pro, M1 Max, M2 Pro and M2 Max models support multiple displays natively.
This means users of MacBook Air M1/M2 and MacBook Pro 13-inch M1/M2 need an alternative solution to use multiple monitors.
How to connect two or three external displays to a MacBook M1 / M2
By using a docking station with DisplayLink technology, you can bypass the native display limitation. DisplayLink uses a virtual GPU to enable multiple extended displays over a single USB-C connection.
The Casecentive 13-in-1 USB-C DisplayLink Docking Station allows you to connect up to three external monitors to MacBook M1 and M2 models — fully extended, not mirrored.
How to connect the Casecentive DisplayLink docking station
Connecting the Casecentive dock is simple:
- Connect the docking station to your MacBook using the included USB-C cable
- Connect your monitors via HDMI and/or DisplayPort
- Install the DisplayLink driver
- Restart your MacBook
After installation, macOS will detect all connected monitors as independent external displays.
How many displays does the Casecentive 13-in-1 docking station support?
The Casecentive 13-in-1 USB-C DisplayLink Docking Station supports:
- 1× HDMI 8K@30Hz (DP Alt Mode)
- 1× HDMI 4K@60Hz (DisplayLink)
- 1× DisplayPort 4K@60Hz (DisplayLink)
This allows up to three external displays simultaneously on MacBook M1 and M2 systems.
Want to learn more about docking stations and multi-monitor setups?
How does DisplayLink technology work?
DisplayLink works by compressing video data and transmitting it over USB-C. A dedicated driver on your MacBook decodes this data and renders it as additional displays.
This makes it possible to use multiple extended monitors even on systems that normally support only one external screen.
Download the official DisplayLink driver for macOS
What are the benefits of DisplayLink?
- Enables multiple external displays on MacBook M1 and M2
- Works with macOS, Windows, ChromeOS and Linux
- Supports extended (not mirrored) desktops
- Ideal for productivity, trading, editing and multitasking
How do you set up multiple external monitors on macOS?
Once the monitors are connected and the DisplayLink driver is installed:
- Go to System Settings
- Open Displays
- Choose Extend Display
- Arrange the monitors to match your desk setup
Each display can be used independently for different applications and workflows.
Which docking station do you need for MacBook M1 / M2?
Not all docking stations support multiple displays on MacBook M1 and M2. You specifically need a dock with a built-in DisplayLink chipset.
The Casecentive 13-in-1 USB-C DisplayLink Docking Station is designed for professionals who need maximum screen real estate, fast networking, powerful charging and full connectivity — all through a single cable.
Installing a DisplayLink docking station
Do you want to use multiple external displays via a DisplayLink docking station? First, check your laptop’s manual to confirm that DisplayPort over USB-C is supported. If your laptop is compatible, installing your DisplayLink docking station is quick and easy.
Step 1. Prepare everything you need
Make sure everything is ready before you start, so you can get set up without interruptions:
- Choose a workspace with enough room
- Have your fully charged laptop ready
- Set up your monitor(s)
- Unbox the DisplayLink docking station
- Make sure you have the correct HDMI or DisplayPort cables
Step 2. Download the DisplayLink software
Installing the correct software is required for DisplayLink docking stations. Always use the official drivers provided by Synaptics (DisplayLink).
Download DisplayLink for Apple (macOS)
Download the DisplayLink driver for Apple (macOS) here
Download DisplayLink for Windows
Download the DisplayLink driver for Windows here
ChromeOS
Using a Chromebook? You can skip this step. On ChromeOS, DisplayLink support is built in by default.
Step 3. Connect the dock to your laptop
DisplayLink docking stations connect via USB-A or USB-C.
- Connect the docking station to a USB port on your laptop
- If your laptop supports Power Delivery, it will start charging immediately
Step 4. Connect your monitor(s)
Step 4a. Connecting monitors on macOS
DisplayLink is the only technology that allows multiple external monitors to be used on MacBook models with M1 or M2 chips (depending on the docking station).
- Click System Settings
- Go to Displays
- Set the desired resolution for each monitor
- Adjust the order of the displays using “Arrange”
Step 4b. Connecting monitors on Windows or ChromeOS
On Windows and ChromeOS, DisplayLink works immediately after installation.
- Go to Settings
- Click System
- Open Display
- Set the resolution and screen layout
Step 5. Complete your setup
Once your laptop and monitors are working, you can connect all accessories:
- Connect a mouse, keyboard or USB drive via USB-A or USB-C
- Use the SD or microSD card reader for media
- Connect to stable wired internet using the Ethernet port
- Plug in wired headphones or a microphone via the 3.5 mm audio jack
Your DisplayLink setup is now fu