
- 16 Jun 2026
Latest Automatic Cat Litter Box of 2026: The CATLINK Open X
The CATLINK Open X is the latest self-cleaning litter box with an open-top design, app control and up to 15 days of hands-free use. Below you can read everything about the models, features and accessories.
CATLINK Open X: the smartest self-cleaning litter box
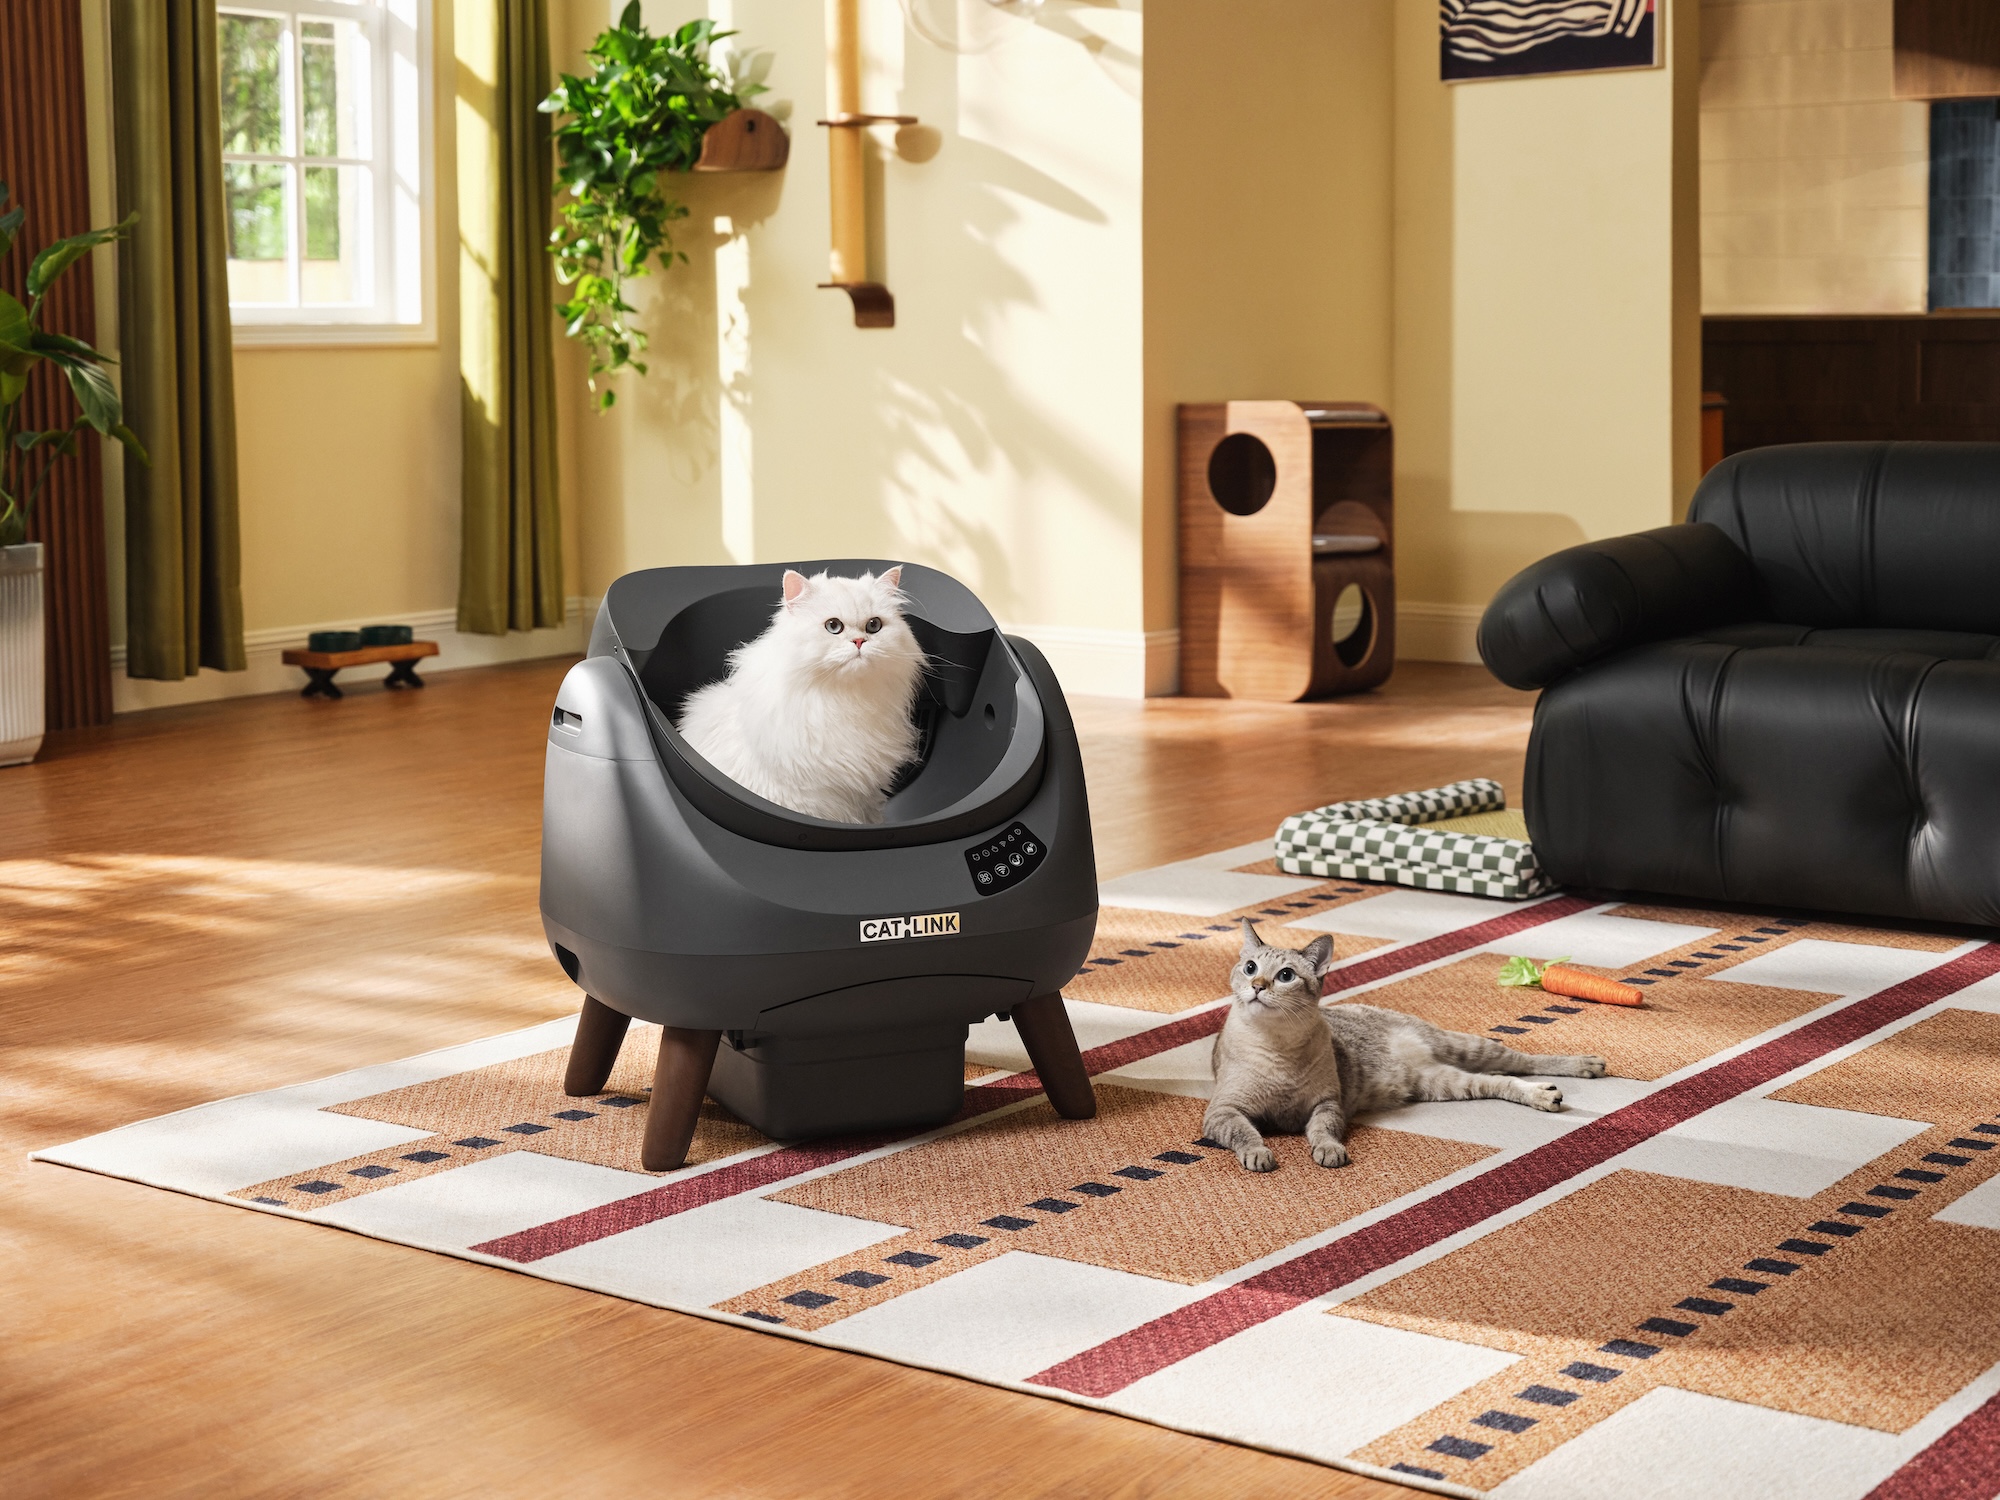
Cleaning the litter box is not most cat owners' favourite chore. But what if your litter box cleans itself, keeps you updated via an app on how your cat is doing, and keeps all the litter neatly contained? That is exactly what the CATLINK Open X was made for.
CATLINK is one of the fastest-growing brands in smart litter boxes and is known worldwide for its thoughtfully designed products. The Open X is the latest flagship model: a self-cleaning litter box with an open top, comprehensive safety sensors and a unique 4-step odour control system. Whether you have one cat or several, the Open X adapts to your situation.
In this article you will find everything about the Open X system: how it works, what makes it unique, which model suits you best, and which accessories make it even easier. We also discuss the difference with the Open X Lite for those who want to start with something more compact.
Key specifications at a glance
Why the CATLINK Open X is different
Thanks to the open-top design, cats never feel trapped. They can step in and out easily, even during a cleaning cycle, as the entrance always remains open.
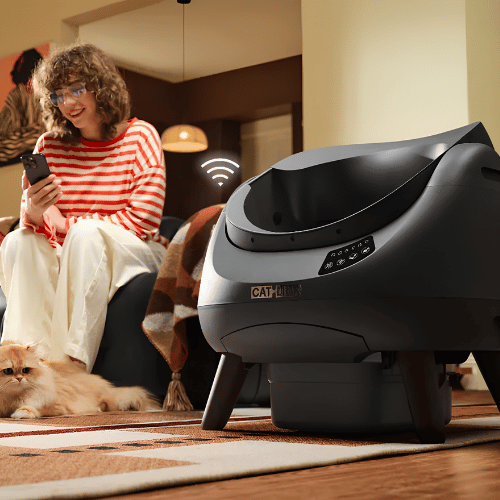
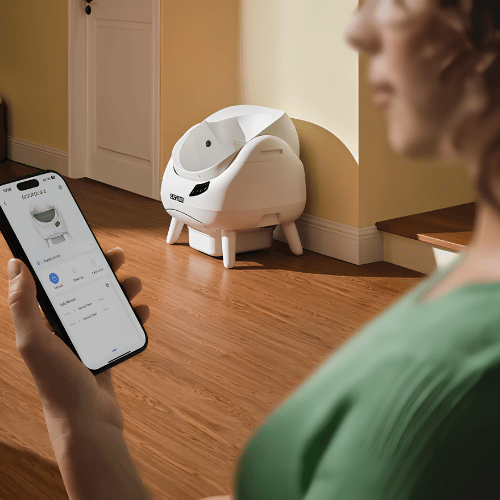
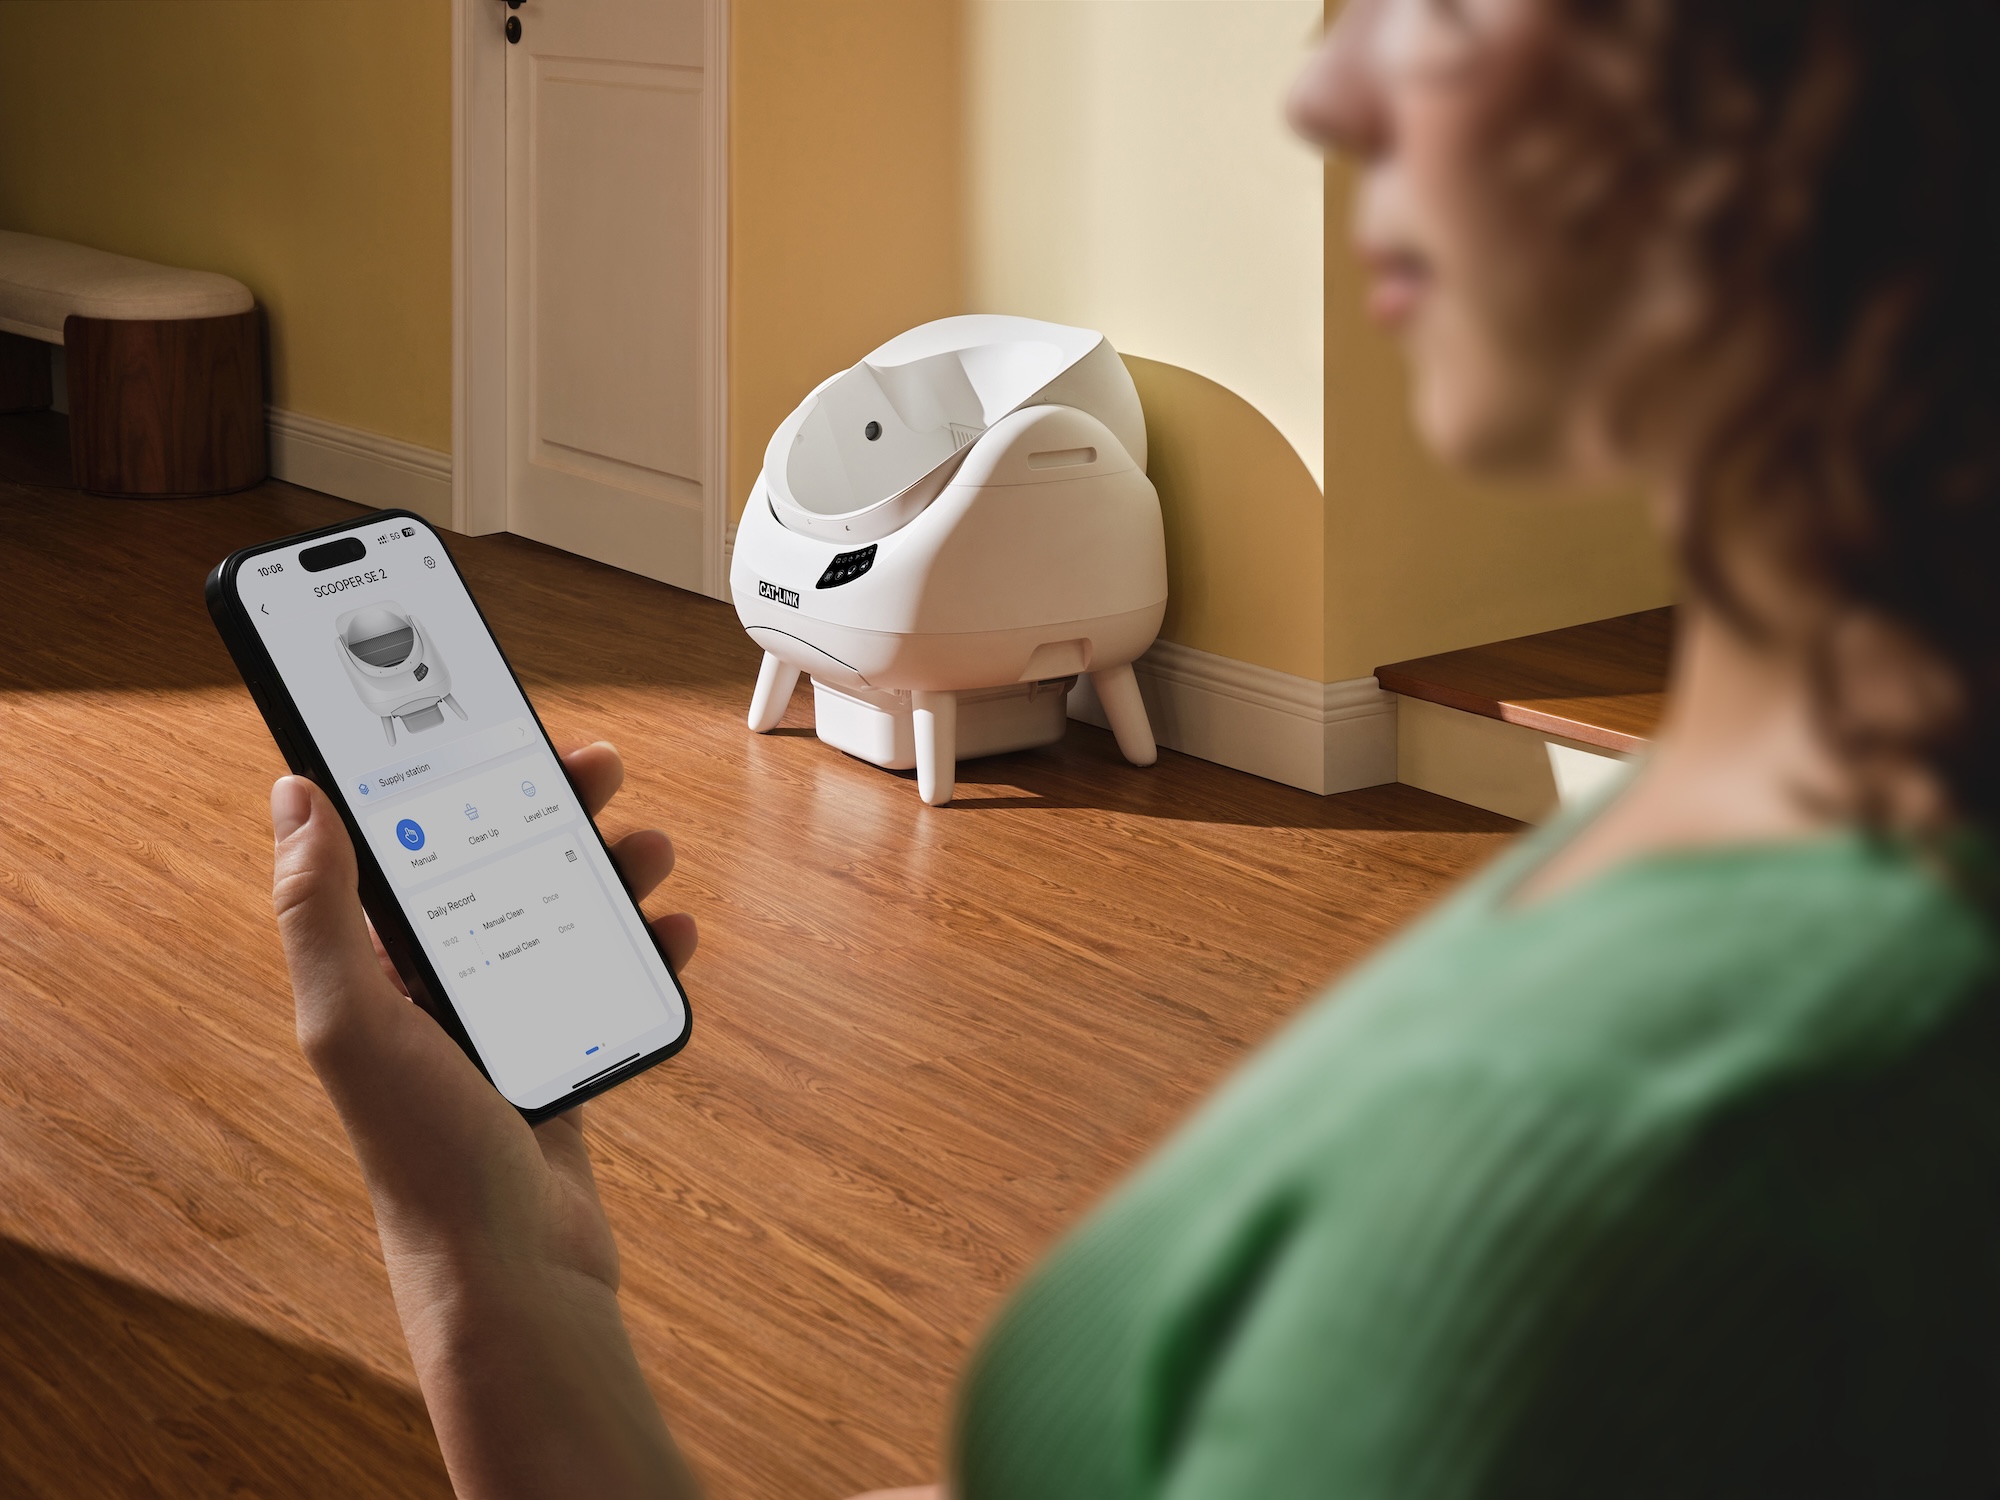
Connect the Open X to your smartphone via the CATLINK app. You receive notifications for each visit, see weight, usage frequency and duration per cat, and can remotely start cleaning cycles.
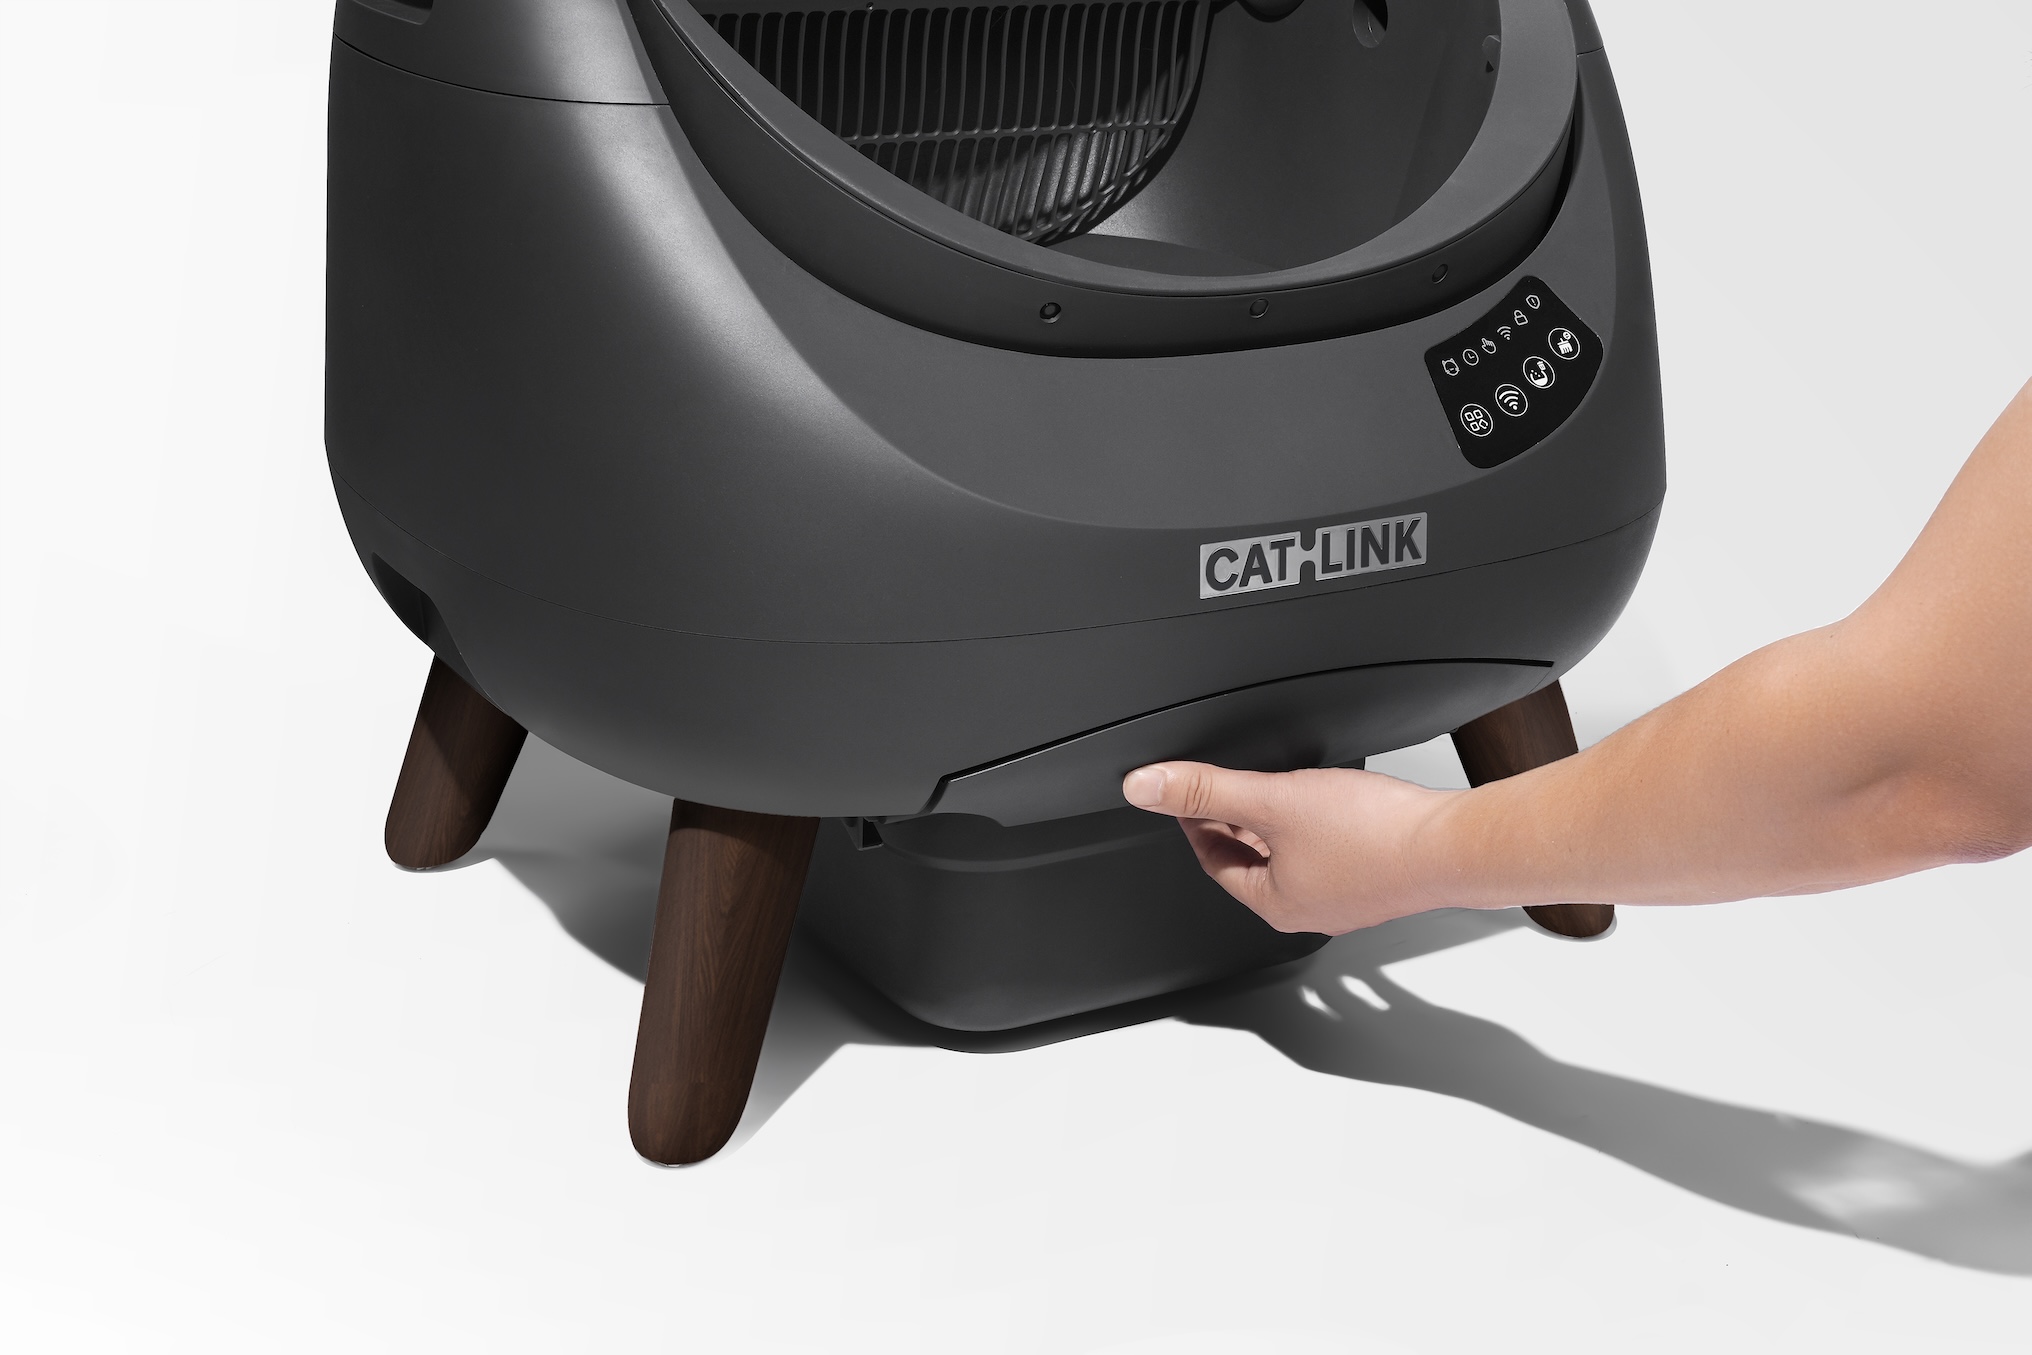
An anti-pinch system, infrared sensors, weight sensors and a patented incomplete gear mechanism ensure the unit always stops when a cat is nearby.
The system combines a built-in odour filter, automatic sealing of the waste container, a ventilation system and active carbon filtration for a fresh home, even with multiple cats.
How does the self-cleaning system work?
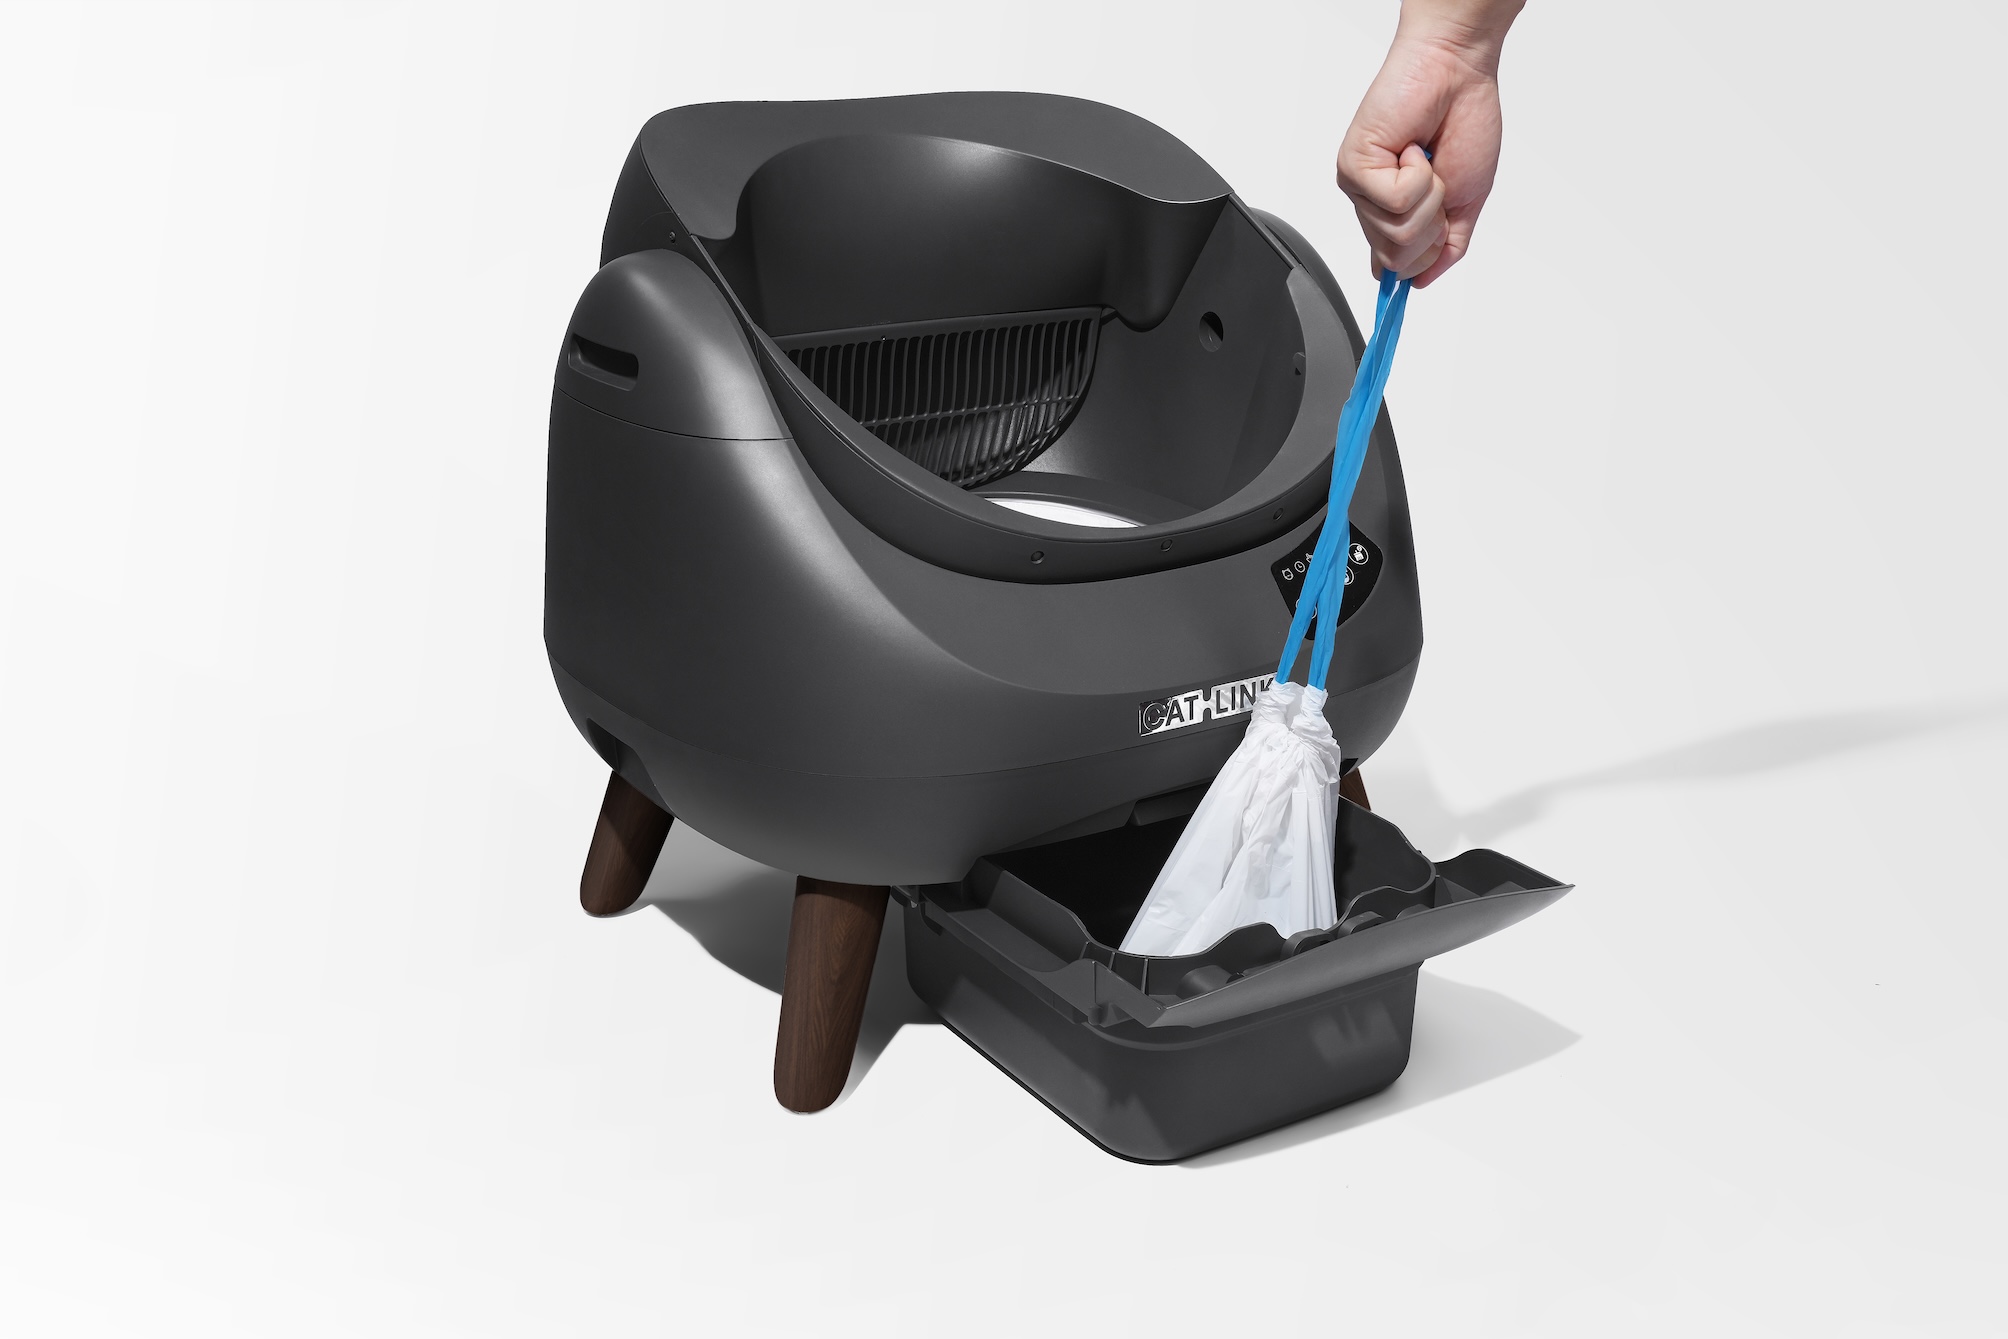
After every visit from your cat, the Open X automatically runs a cleaning cycle. A rotating sieve mechanism separates clumped litter from clean sand and drops the clump into the sealed 12-litre waste container. The whole process takes just a few minutes and makes very little noise. You can set the delay after use via the app, from a few minutes to several hours, depending on your preference.
An extra clever addition is the umbrella-shaped drainage structure around the sand area. When a cat urinates along the edge, this structure directs the urine straight back into the litter, preventing leakage underneath the mat — a problem that does occur with many other self-cleaning litter boxes.
The waste container is fully sealed once the cycle is complete. This effectively blocks odours. With normal use by one cat, you can leave the container for up to 15 days before needing to empty it. A notification in the app automatically warns you when the container is almost full.
All features of the CATLINK Open X
- Spacious open-top design, suitable for cats up to 10 kg
- Automatically self-cleaning after every litter box visit
- 12-litre sealed waste container, up to 15 days hands-free
- App control via CATLINK app (iOS and Android)
- Real-time health monitoring per cat (weight, frequency, duration of use)
- Multi-cat recognition (Open X, not Lite)
- 4-step odour control system
- 4-layer safety protection: infrared, weight, anti-pinch, gear lock
- Dual-band WiFi (2.4 GHz and 5 GHz)
- Night mode for silent operation
- Automatic 'soft stool burial' mode
- Removable and easy-to-clean design
- Anti-scatter features: threshold edge and drainage structure
- Compatible with any clumping cat litter


CATLINK Open X or Open X Lite: which one suits you?
The Open X is available in two versions. The Open X Lite is the entry-level option for owners with one cat, while the Open X is the premium model with multi-cat recognition for households with multiple cats. Both models have the same dimensions and the same cleaning system.
| Feature | Open X Lite | Open X |
|---|---|---|
| Price | € 229.99 | € 249.99 |
| Colour options | White | White / Grey |
| Self-cleaning system | ✓ | ✓ |
| 12L waste container | ✓ | ✓ |
| App control and health data | ✓ | ✓ |
| 4-step odour control | ✓ | ✓ |
| Dual-band WiFi (2.4 + 5 GHz) | ✓ | ✓ |
| Multi-cat recognition | Optional (+€30) | ✓ Included as standard |
| Suitable for | 1 cat (expandable) | 1 or multiple cats |
Choose your model
The CATLINK Open X product line
The Open X line consists of three models. All three are equipped with the same powerful cleaning system and comprehensive app connectivity. The difference lies in the entry level and colour.


More than a litter box: a health monitor
One of the most remarkable aspects of the Open X is its integration with the CATLINK app. Every time your cat uses the box, weight, duration of use and frequency are recorded. Changes in this pattern — such as a cat using the box more or less often — can be early signs of health issues such as kidney problems or constipation.
Via the app you also set the cleaning timing, activate night mode so the box stays quiet at night, and receive a notification when the waste container is almost full. Connection is via dual-band WiFi (both 2.4 GHz and 5 GHz), providing a stable and fast connection in any household.
For households with multiple cats, the Open X (not the Lite) goes even further: the system recognises each cat individually by weight and records data per cat. So you always know which cat used the box and when.
Accessories for the CATLINK Open X
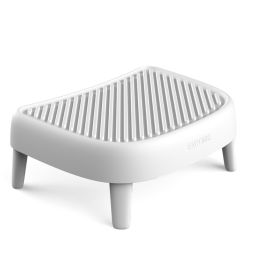
Complete the set with the CATLINK Stairway
The CATLINK Open X has an open top, which is great for most cats, but for older, larger or less mobile cats, getting in can be a challenge. The CATLINK Stairway for Open-X solves this elegantly. The steps are specially designed for the Open X and fit it seamlessly.
In addition to better accessibility, the Stairway catches up to 99% of the cat litter that sticks to paws. The built-in collection section keeps your floor clean. It also features a handy storage compartment for spare waste bags and accessories, so everything is within reach.
The Stairway attaches without tools and is easy to remove for cleaning. Available in white (matching the Open X Lite and Open X White) and grey (matching the Open X Grey).


Installation: ready to use quickly
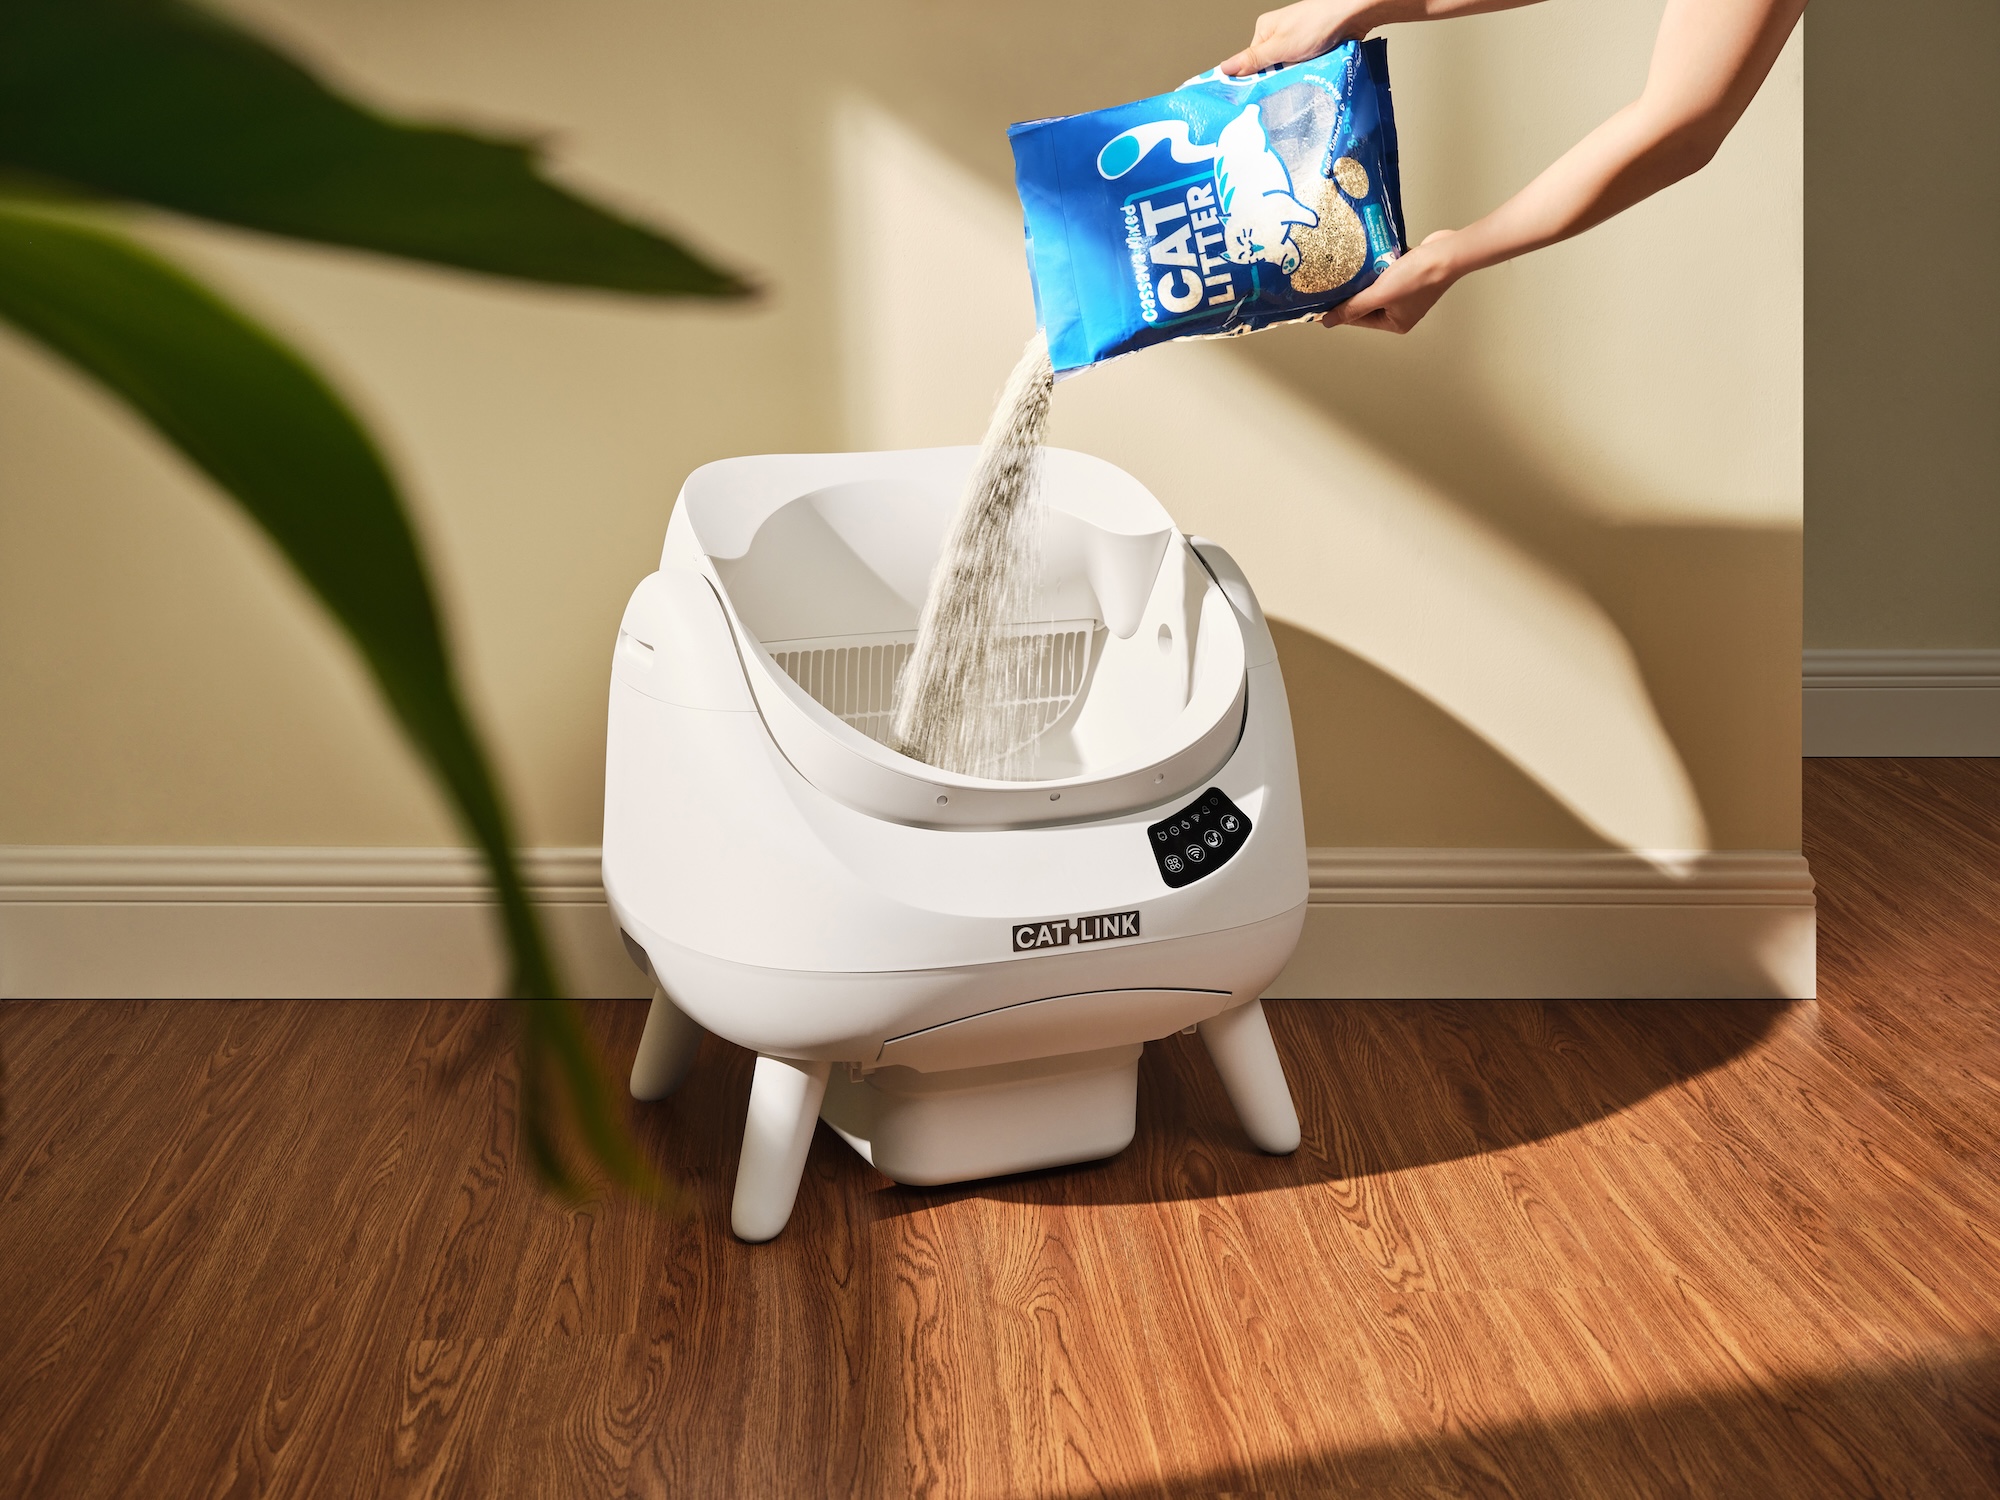
The CATLINK Open X is designed for easy setup. After unboxing, you attach the waste container, add cat litter (minimum 5 cm deep for optimal performance), connect the unit to a power socket and download the CATLINK app. Via the app you connect the unit to your WiFi network, which happens incredibly quickly thanks to the built-in dual-band chip. After that, you can start configuring straight away.
It is advisable to manually start the first few cleaning cycles via the app, so you can check that everything works correctly and your cat gets used to the sound of the unit. Most cats quickly adapt to the automatic cleaning, especially thanks to the open design where they don't feel enclosed.
Frequently asked questions
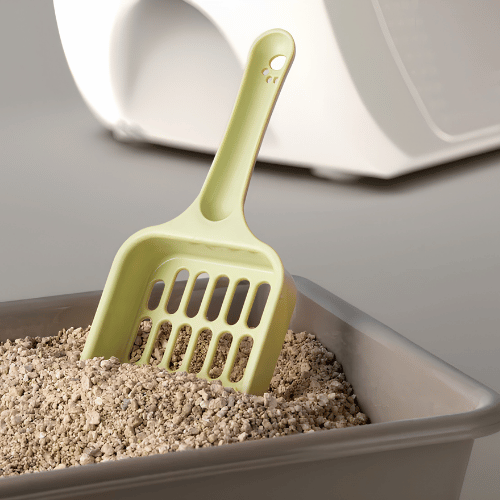
Use only high-quality clumping cat litter. The CATLINK Mars 2.0 is specially tailored to the sieve mechanism of the Open X, but any high-quality clumping bentonite litter that forms firm, compact clumps works excellently.
Recommended litter:
- Best choice: CATLINK clumping bentonite litter, specially optimised for this system
- Excellent: Premium clumping bentonite, preferably unscented
- Good: Natural clay granules with strong clumping action
Practical tips:
- Start with at least 4 litres of litter, up to the MAX marking
- Replace the entire contents every 2 to 3 weeks for optimal performance
- Always level the litter after topping up, so the sensors measure correctly
Our team is happy to help you choose the right model or accessory for your situation.
Contact us