Installation Wahoo KICKR CORE

Once you have received your Wahoo KICKR CORE you will naturally want to unpack and use it as soon as possible. To help you do this we have outlined some important steps to follow. Follow these steps carefully to get the most out of your Wahoo KICKR CORE!
1. Unboxing
Before you can use the Wahoo KICKR CORE you need to put it together. Fortunately, this is very easy. First you need to assemble the legs of the KICKR CORE. See the step-by-step plan below on how to do this easily and quickly.
1. The KICKR CORE comes with the legs detached to minimize transportation and storage. First, choose a stable, flat surface with enough room for the trainer and the bike. We advise you to use a training mat for optimal noise reduction.
2. Attach the legs by inserting the supplied bolts through the bottom of the trainer legs, then secure them with the supplied nuts and hex wrench tool on the opposite side. Make sure the long leg is on the front of the trainer. Repeat the process for the second leg and tighten all bolts firmly.
3. After attaching both legs, pull the front leg fully forward to fully extend the base of the trainer and ensure maximum stability.
4. Use the included power adapter to power the KICKR CORE.
2. Cassette Mounting
The Wahoo KICKR CORE comes without a cassette, so you have to assemble it yourself. The video below shows you how to mount a cassette.
Note: The cassette installation is shown on a KICKR POWER '17 but is almost identical for the KICKR CORE.
3. Installing your bike
To use this trainer, you need to remove the rear wheel from your bike. You can easily secure your bike by using a quick release skewer or a thru axle. If the rear wheel is secured with a quick release, you can easily secure it with the Wahoo KICKR quick release. See the instructional video below to see how to secure your bike.
4. Start cycling
Once your bike is securely mounted on the trainer, you can now start cycling! The Wahoo KICKR CORE should be calibrated from time to time to ensure that the power measurement is as accurate as possible. Especially the first time you go cycling is recommended. This is quick and easy to do via the Wahoo app. You can download it via the App Store or Google Play Store.
5. Complete your Set-up
To really get the most out of your indoor season, update your indoor set-up some more. These four products you really can't miss!
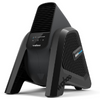
The KICKR HEADWIND
The KICKR HEADWIND is the first ever smart fan designed with the cyclist in mind. With speeds of over 48 km / h, that HEADWIND keeps you cool during the toughest training sessions. Cycling at home has never been so realistic!
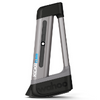
The Wahoo CLIMB
The Wahoo Fitness KICKR CLIMB is the choice of many champions. It is characterized by its ultimate power, accuracy and responsiveness tailored to the most demanding cyclists. Cycling elevated and lowered courses has never been more realistic!
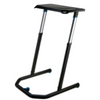
The Wahoo DESK
The Wahoo KICKR Indoor Cycling Desk is the ideal platform for your bike trainer setup. Are you always short of space to store all your gear while working out indoors? With the Wahoo KICKR Indoor Cycling Desk, your laptop, smartphone, water bottle and towel are now always within easy reach.
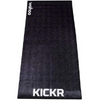
This Floormat is multifunctional. First of all, this Floormat provides extra grip for your Wahoo KICKR. It is water resistant and therefore super for catching all the sweat. In addition, this mat is sound dampening which ensures that no one else hears you. You can also use the mat for exercises without KICKR. The 6 mm thick foam provides extra comfort during your exercise!


